How to Make a 3D Printed Jigsaw Puzzle Map
Turn your favorite mountain, home town or hiking area into a jigsaw puzzle you can print: real terrain, colored landscape, interlocking pieces and a holder to keep them in. It's a great weekend project and the perfect personalized gift. This tutorial starts from zero. No Blender or 3D modeling experience needed.
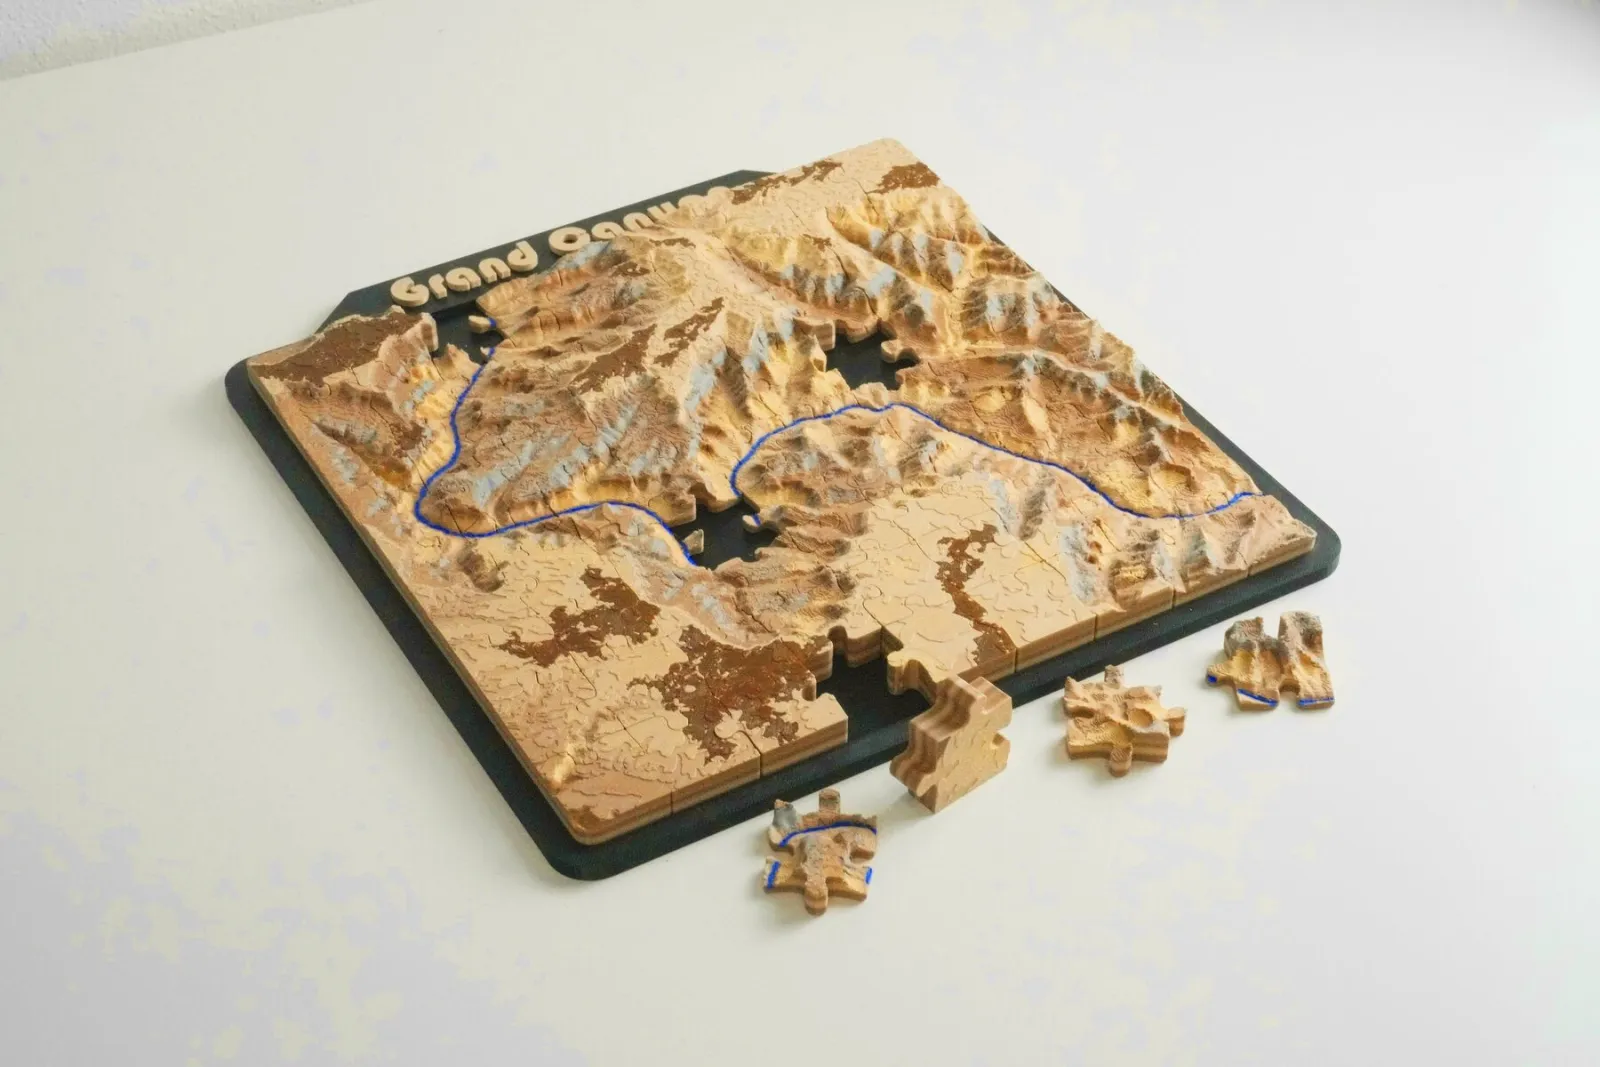
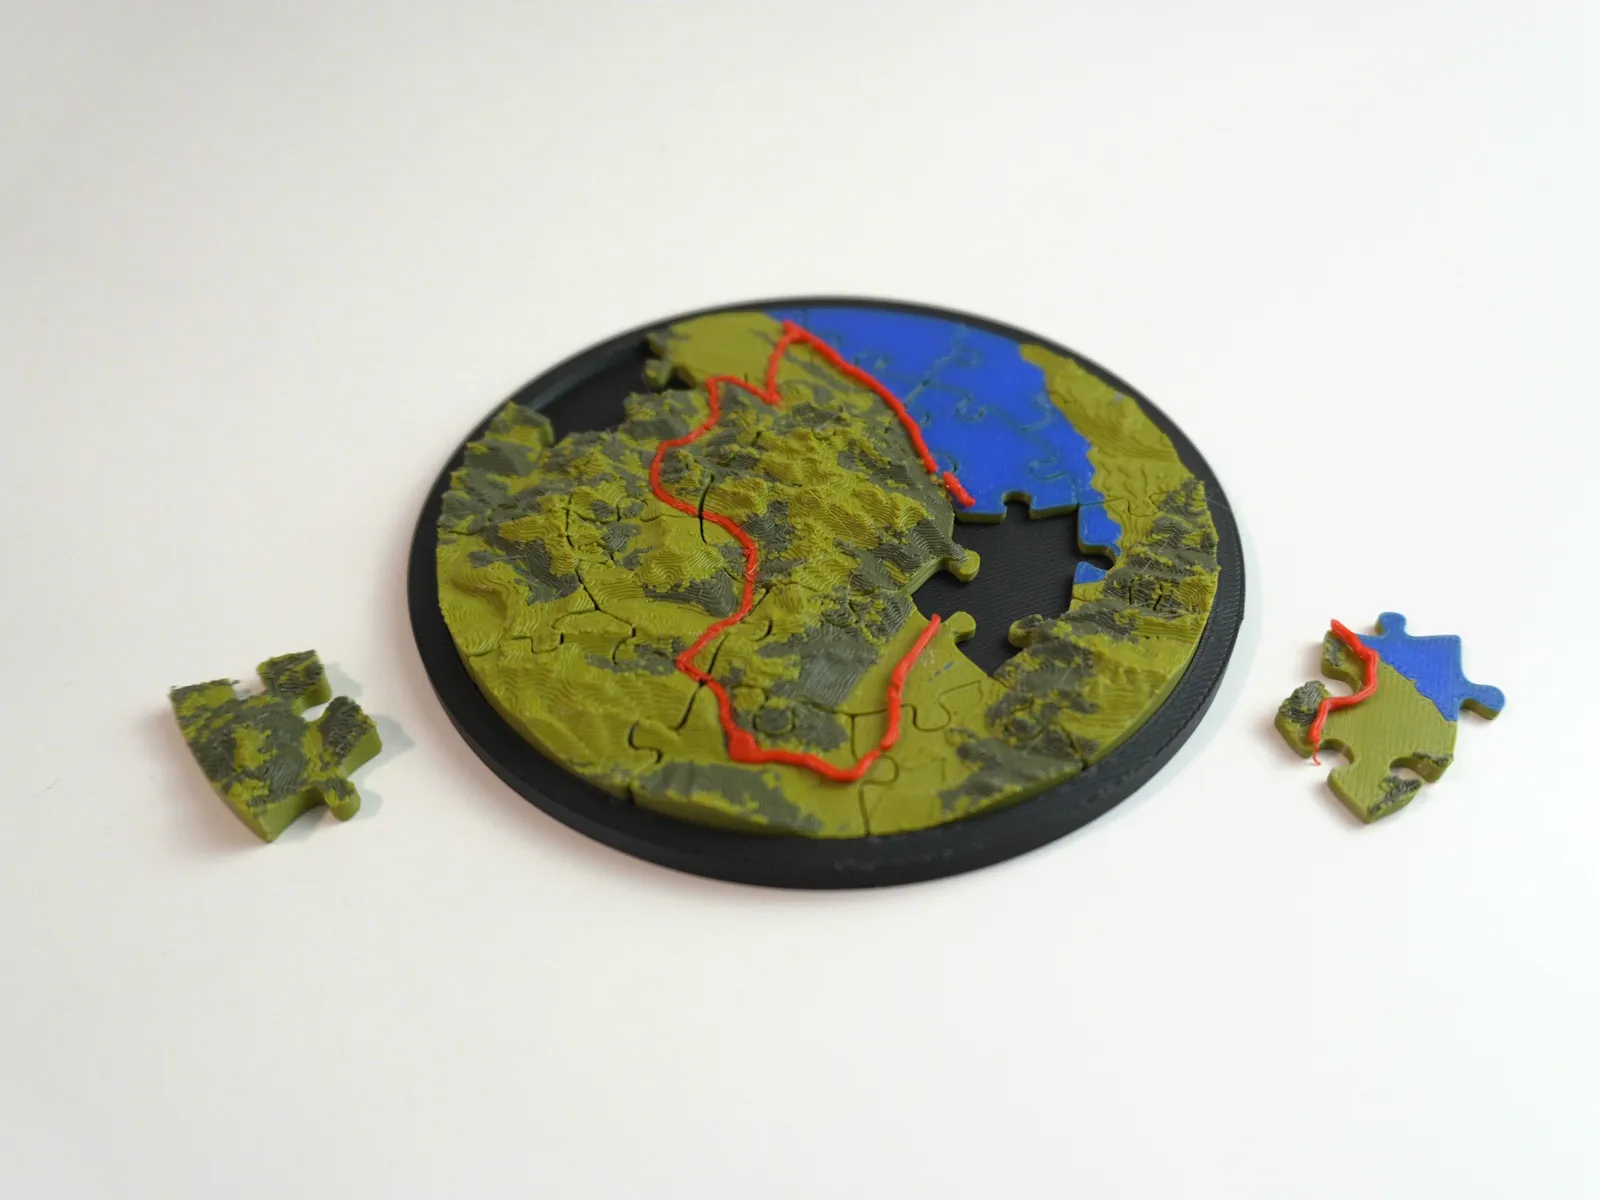
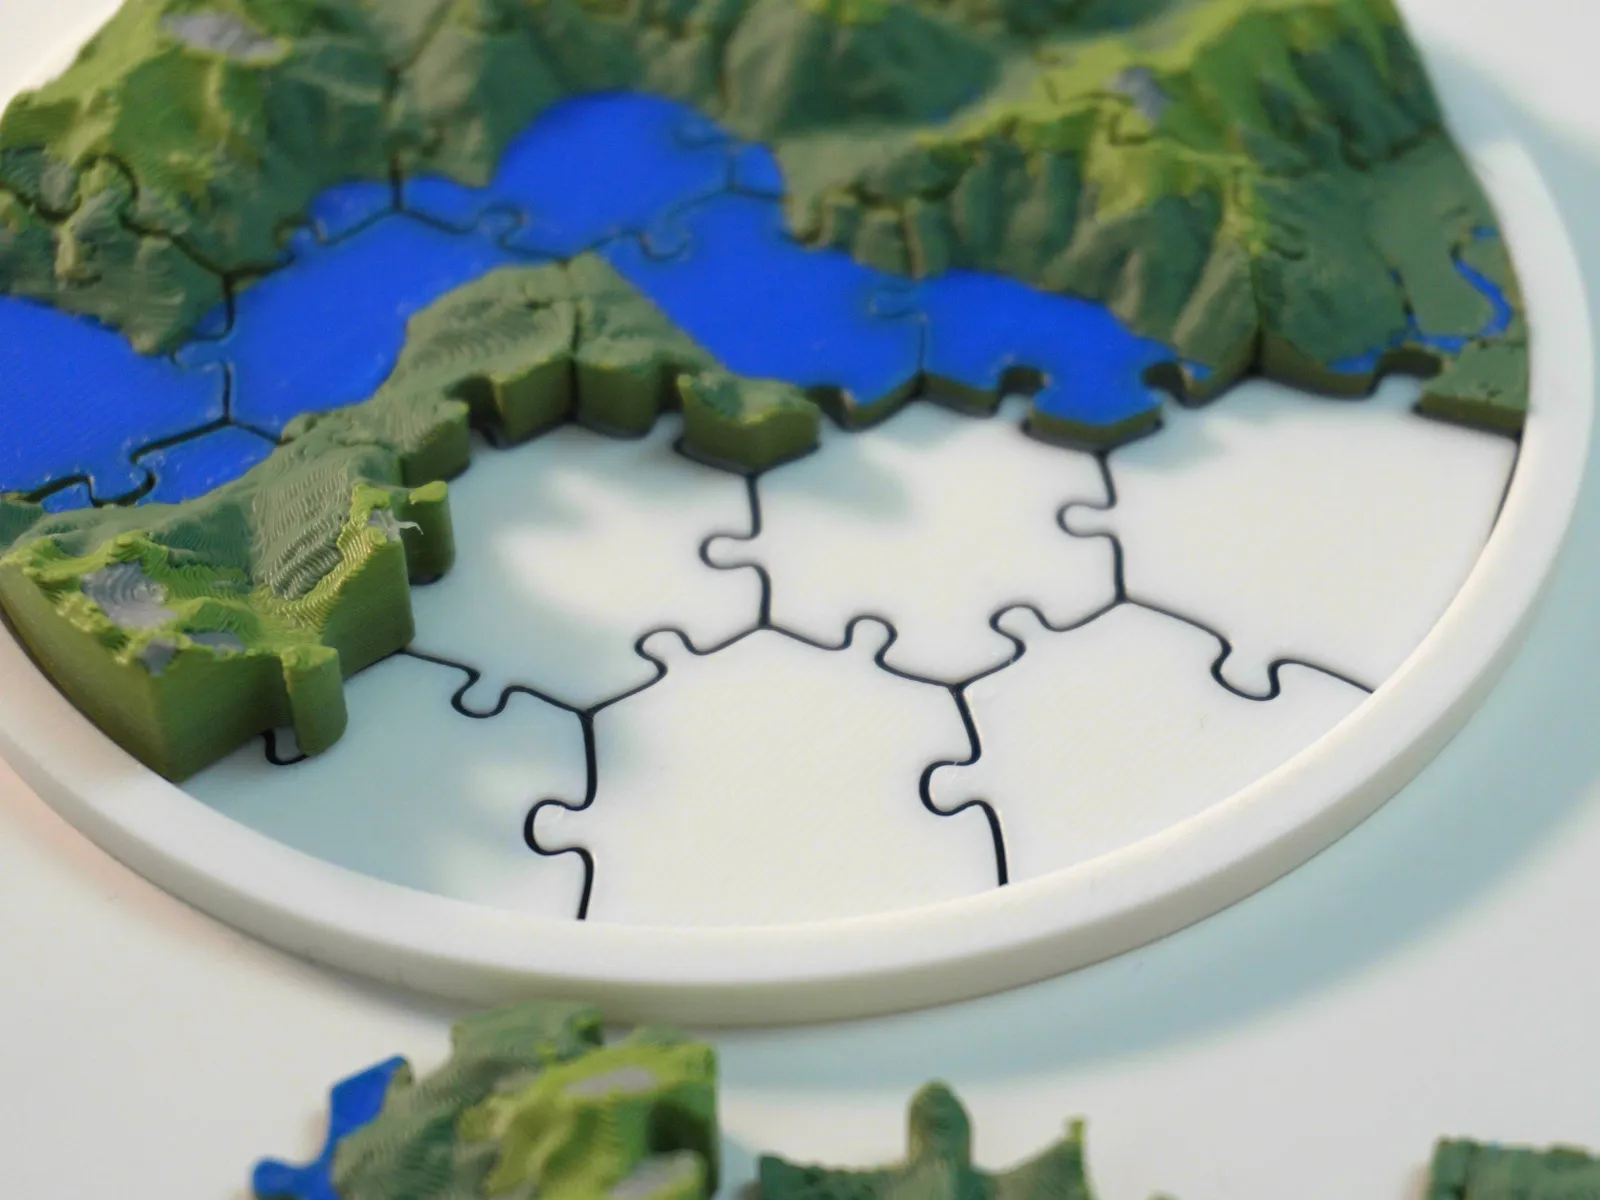
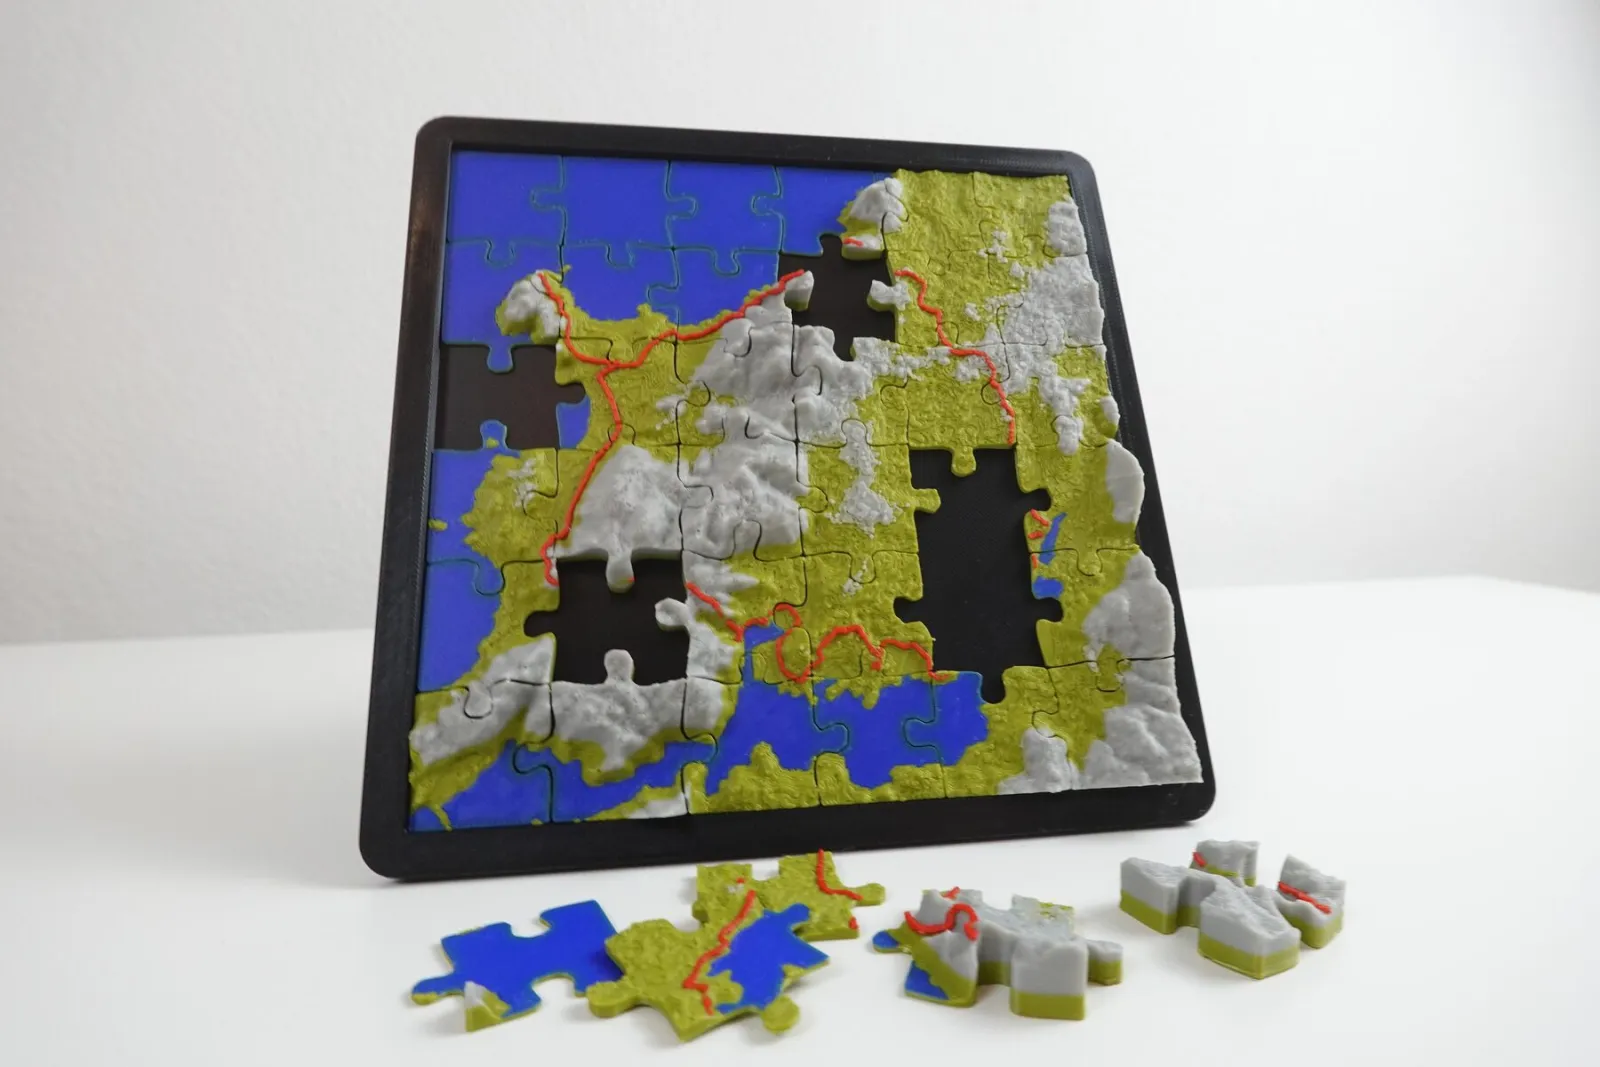
The perfect personalized gift
A puzzle of the place where you met, got engaged, grew up or hiked your first summit makes a gift nobody else can buy. Add the trail of a shared adventure, the name of the place or a date on the holder, and you have a one-of-a-kind present for birthdays, anniversaries, Christmas or anyone who loves the outdoors. And it doubles as a beautiful map on the shelf once it's solved.
Quick answer: Install the free 3D program Blender and the free TrailPrint3D add-on. Then open TrailPrint3D → Jigsaw Puzzle Generator, draw your area on the map, choose the size and number of pieces, and click Generate. You get print-ready files for every piece plus a holder. Total time for your first puzzle: about 15 minutes.
What you need
- A computer (Windows, macOS or Linux) with an internet connection. The terrain and landscape data are downloaded while your puzzle is generated.
- Blender: a free 3D program. TrailPrint3D runs inside it, but you won't need to learn Blender itself. We'll install it in Part 1.
- A 3D printer and a slicer. The slicer is the program that prepares files for your printer, e.g. Bambu Studio, PrusaSlicer, OrcaSlicer or Cura. A multi-color printer gives you a colored puzzle, but a single-color printer works too.
In this tutorial we build a 4 × 4 puzzle (16 pieces) of Mount Fuji in Japan.
Part 1 — Install Blender and TrailPrint3D
You only need to do this once.
- Install Blender. Download it for free from blender.org (version 5.1 or higher) and install it like any other program.
- Download TrailPrint3D. On the download page, click the free download. You get a
.zipfile. Don't unzip it, Blender installs the zip file directly. - Open Blender. If a splash screen appears, click anywhere outside it to close it. You now see Blender's 3D Viewport with a cube in the middle. Don't worry about it, you can leave it there.
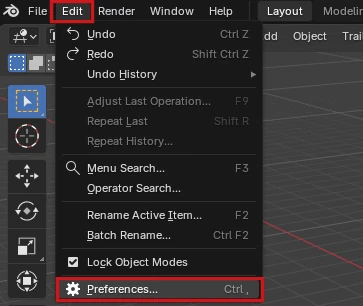
- Open the add-on settings. In the top menu, go to Edit → Preferences, then click Add-ons in the list on the left.
- Install the add-on. Click the small arrow in the top-right corner of the Add-ons panel, choose Install from Disk… and select the TrailPrint3D
.zipfile you downloaded.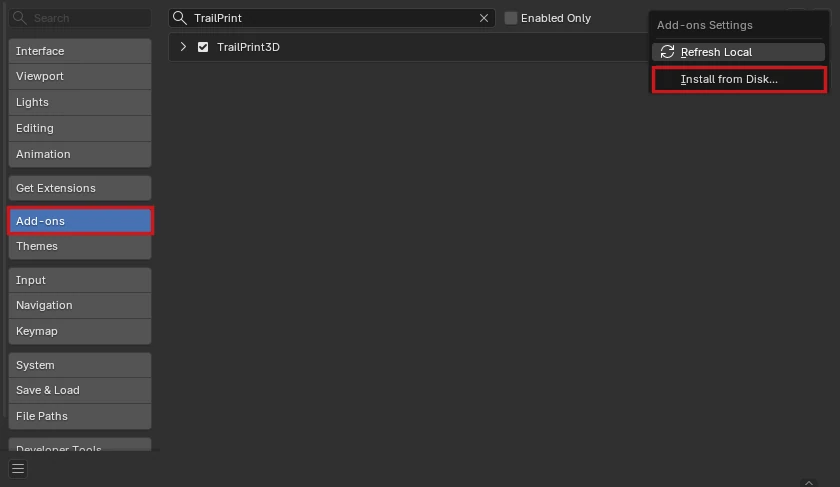
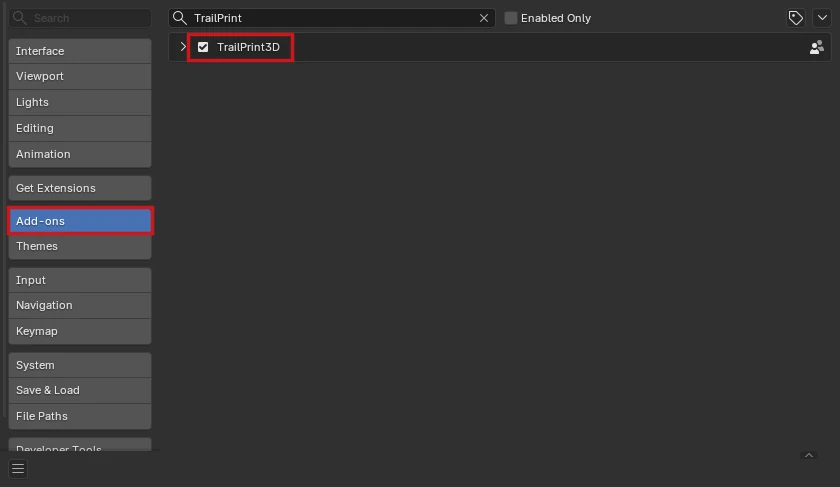
- Enable it. Make sure the checkbox next to TrailPrint3D is ticked, then close the Preferences window.
You should now see a new TrailPrint3D menu in the top bar of the 3D Viewport. That's where all generators live:
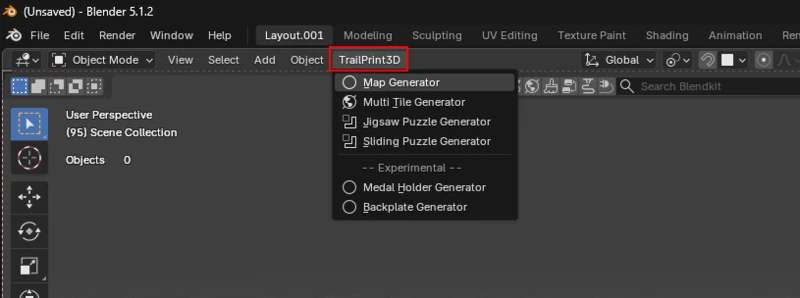
Don't see it? Check that the checkbox is ticked in Edit → Preferences → Add-ons, and that your Blender is version 5.1 or newer (shown on the splash screen and under Help → About Blender).
TrailPrint3D can update itself later: in Edit → Preferences → Add-ons → TrailPrint3D, click Check for Updates whenever a new version comes out.
Part 2 — Open the Jigsaw Puzzle Generator
- Click TrailPrint3D → Jigsaw Puzzle Generator. The generator opens in your web browser as an interactive map. It stays connected to Blender, so keep Blender open while you work.
- Choose an export folder. The first time, you'll see a Select Export Folder button at the bottom left. Click it and pick (or create) a folder, e.g.
Documents/TrailPrint3D. This is where your printable files will be saved. Once it's set, the button turns into Generate. - Optional: install the free 3MF add-on. If you see an Install free 3MF Addon button, click it. It lets TrailPrint3D save your puzzle as a single
.3mffile with all colors and pieces in place, which is the easiest way to get it into your slicer.
The generator also offers an interactive tutorial that walks you through this exact Mount Fuji puzzle on the page itself. You can start it any time with the Tutorials button at the top of the map.
In version 4.0, the Generate button is still called Send to Blender. It does the same thing.
Part 3 — Design your puzzle
1. Draw your area
- Find your place. Drag the map with your mouse and zoom with the scroll wheel, or click the location pin in the top-right corner to search for a city or enter coordinates.
- Click the pencil in the toolbar on the left of the map, then click and drag a box over the area you want to print. Let go of the mouse when you're done.
- Adjust it. Drag a corner of the orange box to resize it, or the handle in the middle to move it. Keep the most interesting spot (here the summit) in the middle of the puzzle.
- Switch to the Topographic map with the layer button at the bottom left. It shows mountains and valleys, so you can see what will become 3D terrain.
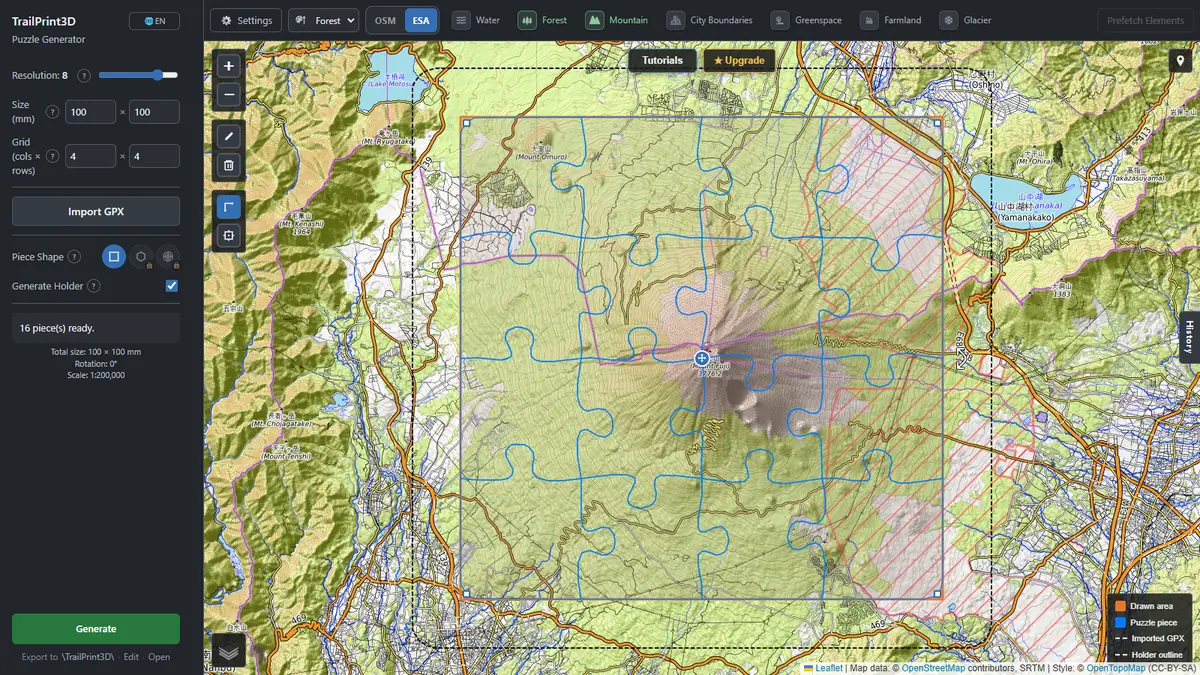
2. Choose size and number of pieces
The main settings are in the sidebar on the left. The pieces on the map update as soon as you change something.
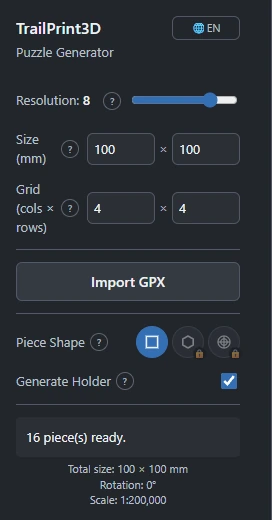
- Size (mm): the size of the whole puzzle, length × width. Make sure it fits on your printer's build plate. We kept 100 × 100.
- Grid (cols × rows): how many pieces your puzzle has. We set 4 × 4, which gives 16 pieces of about 25 mm each. For your first puzzle, stay around this piece size: much smaller pieces get fiddly to print and to hold.
- Resolution: how much terrain detail you get. Higher looks sharper but takes longer to generate. The default of 8 is a good choice.
- Piece Shape: Square pieces make a classic jigsaw puzzle with tabs on every inner edge.
- Premium Hexagonal and Concentric-Ring piece shapes.
- Import GPX: optional. Adds a hiking or cycling route to your puzzle. You can export a GPX file from apps like Strava, Komoot or Garmin Connect.
3. Add colors
Map elements give your puzzle its colors: forests, water, rock, cities and more. Click an element in the bar at the top of the map to switch it on or off (green means on).

First pick where the colors come from, with the OSM | ESA switch:
- ESA uses satellite images. Softer shapes, works for areas of any size, great for natural landscapes. We picked ESA and switched on Forest (the lower slopes) and Mountain (the bare rock on top).
- OSM (OpenStreetMap) has sharper shapes and also includes roads and buildings. Best for smaller areas like a town.
The colors are painted onto the top of each piece. A multi-color printer prints them automatically. With a single-color printer, just leave the elements off: the 3D terrain still looks great in one color.
4. The holder
Generate Holder in the sidebar (ticked by default) also creates a tray that holds the finished puzzle. The default settings work well, so you can skip ahead to Part 4. If you want to customize the holder, for example to add the name of the place, click Settings at the top left of the map and open the Puzzle tab. Every setting has a ? that explains it with a preview image.
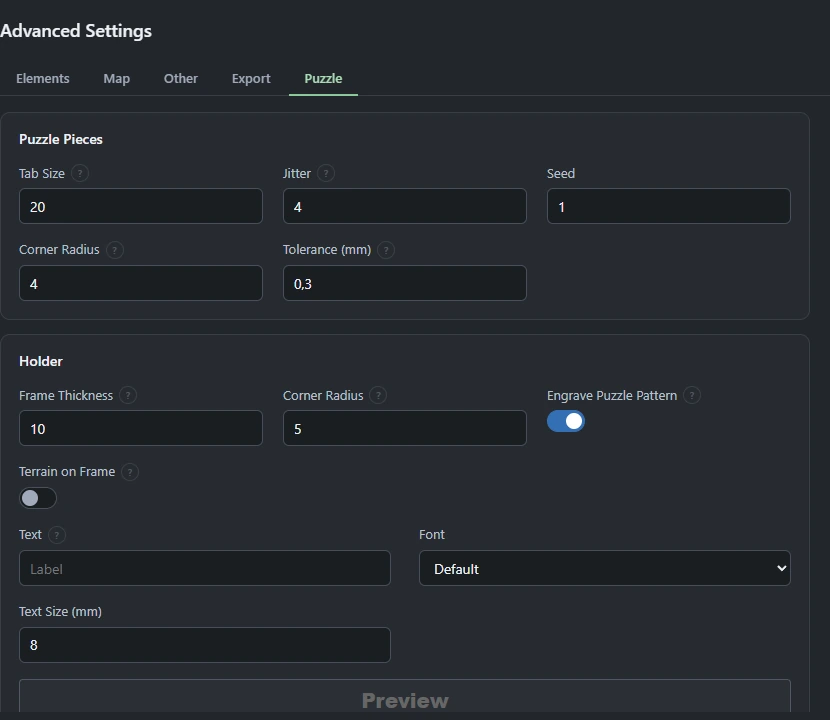
Puzzle pieces:
- Tab Size: size of the tabs that interlock the pieces.
- Jitter: random variation of the cut lines, so every piece gets its own shape.
- Seed: change it to get a different set of piece shapes. The same seed always gives the same pieces.
- Corner Radius: rounds the outer corners of the puzzle.
- Tolerance (mm): the gap between neighboring pieces, so they fit together after printing. 0.2–0.3 mm works for most printers.
Holder:
- Frame Thickness and Corner Radius: width and rounding of the frame around the puzzle.
- Engrave Puzzle Pattern: engraves the cut pattern into the floor of the holder, so you can see where each piece goes.
- Terrain on Frame: continues the terrain onto the frame instead of a flat rim.
- Text, Font and Text Size: a label on the flat rim, like the name of the place (see "Grand Canyon" in the photo at the top).
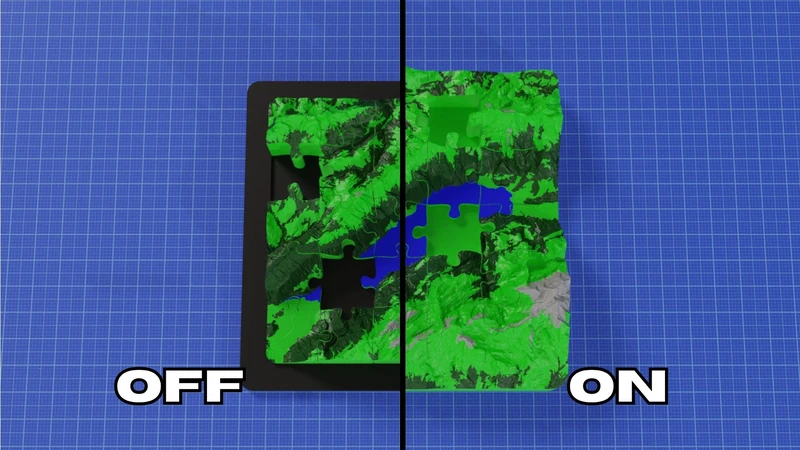
Your changes are saved right away. Close the settings window with the ✕ when you're done.
Part 4 — Generate your puzzle
Click Generate at the bottom left. The browser tab closes and Blender takes over: it downloads the elevation and landscape data, builds the terrain and cuts it into pieces. A progress bar shows how far it is. Our 16-piece Fuji puzzle took under a minute. Larger puzzles and higher resolutions take longer, so don't close Blender while it's working.
When it's done, the puzzle appears in Blender. Each piece is its own object, named by row and column (A1 to D4), plus the holder. To look around: roll the mouse wheel to zoom and hold the middle mouse button to rotate the view.
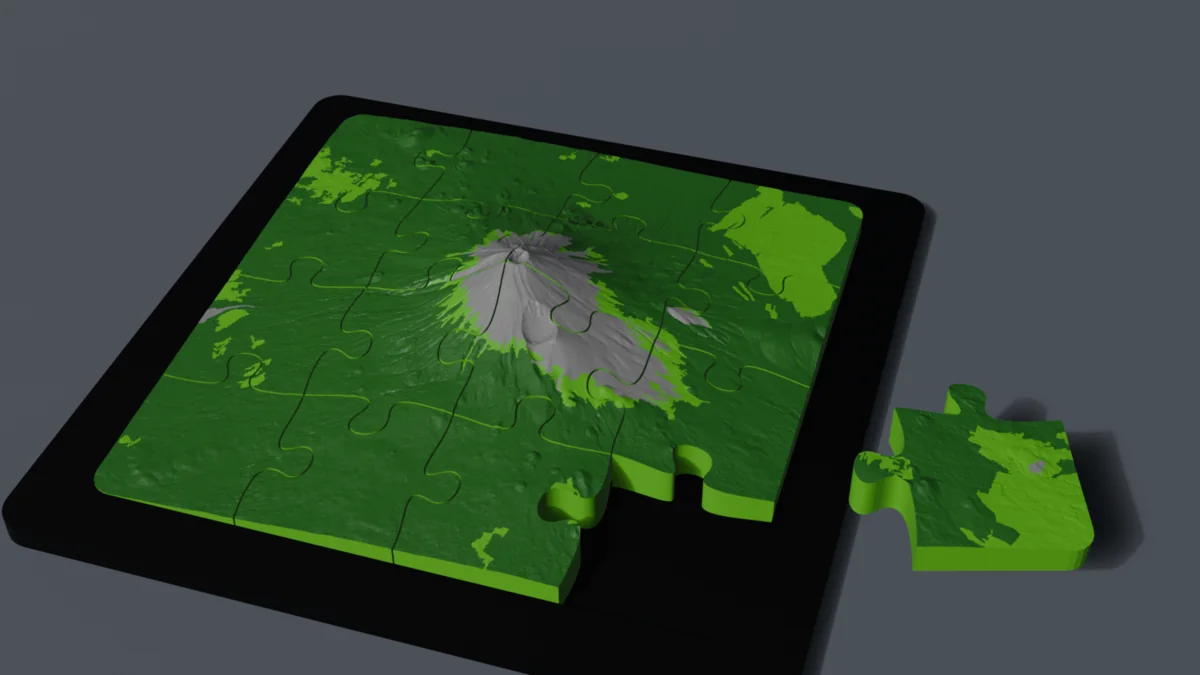
You don't need to save anything in Blender: the printable files have already been exported to your export folder automatically.
Not happy with it? Just open the Jigsaw Puzzle Generator again. Your area and settings are remembered, so you can tweak them and generate again.
Part 5 — Print it
- Open your export folder and load the files into your slicer.
.3mf(if you installed the 3MF add-on): open the single file. All pieces and colors are already in place..stlor.obj: select all files at once and import them together. When the slicer asks whether to load them as a single object, click Yes, so they keep their positions. More details in Import to Slicer.
- Assign your colors (multi-color printers). Your slicer shows the painted colors on the pieces and lets you pick a filament for each one.
- Print the pieces flat on the bed, as they come. They don't need supports.
- Print the holder separately, in any color you like.
- Tip: set the slicer's wall generator to Arachne for cleaner color borders and fine details (see Improve Slicing Result).
If the pieces are too tight or too loose, change the Tolerance in Settings → Puzzle and generate again.
FAQ
Is the Jigsaw Puzzle Generator free?
Yes. Blender and TrailPrint3D are free, and the Jigsaw Puzzle Generator with square pieces, colored terrain and the holder is part of the free version. Hexagonal and concentric-ring pieces, and the Sliding Puzzle Generator, come with Premium.
Do I need to know Blender?
No. You only need Blender to install the add-on and open the generator. Everything else happens on the map in your browser, and the finished files are exported for you.
How many pieces can a puzzle have?
Up to 50 columns and 50 rows. Pieces get small quickly though: on a 100 mm puzzle, 4 × 4 gives roughly 25 mm pieces. For more pieces, increase the size too.
Can I put my hiking or cycling route on the puzzle?
Yes. Click Import GPX in the generator's sidebar and your trail is printed on the pieces along with the terrain.
Can I print the puzzle with a single-color printer?
Yes. The pieces print fine in one color and still show the terrain in 3D. The landscape colors are painted onto the pieces, so you need a multi-color printer to print them in color.
Generation failed or parts of the terrain are missing. What now?
Check your internet connection, since the elevation and landscape data are downloaded during generation. Very large areas with OSM elements can also be too much to fetch; switch to ESA or choose a smaller area. More troubleshooting tips are on the How To page.
Is a puzzle map a good gift?
It's one of the most personal gifts you can make: a place that means something to the person, printed in 3D, with their trail, the place name or a date on the holder. Plan a few days ahead, since printing a 16-piece puzzle and its holder takes several hours.